
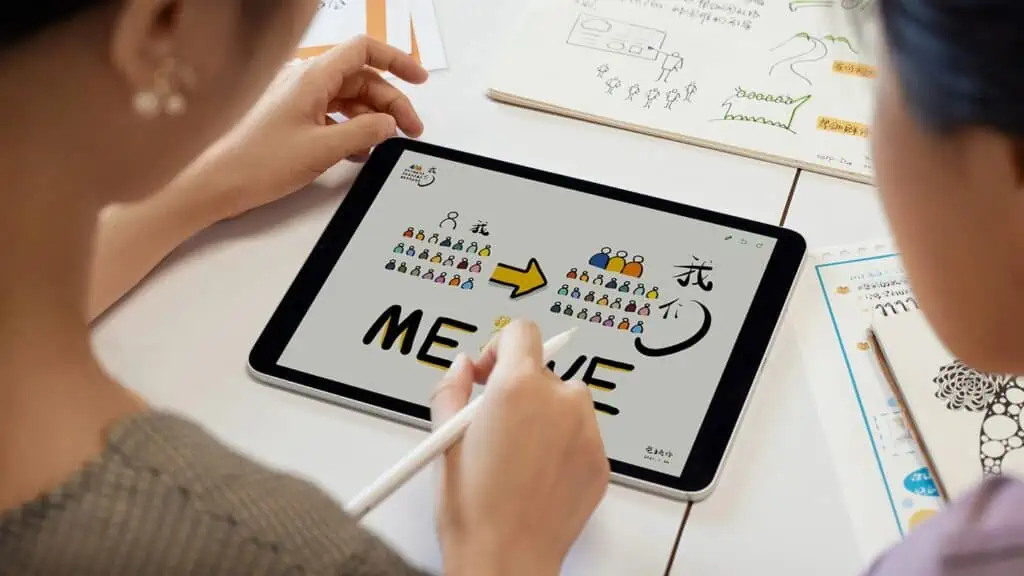
The Apple Pencil has transformed the iPad into a versatile digital drawing canvas. With the precision and responsiveness of the Apple Pencil, creating illustrations, sketches, designs, and art on an iPad is easier and more natural than ever.
In this guide, I will walk you through everything you need to consider when you start drawing on the iPad with the Apple Pencil, including the benefits, how to setup your workspace, and some useful tips and tricks.
Drawing on an iPad with an Apple Pencil can be a game-changer for digital artists. The precision, control, and range of tools available can transform your digital art experience. However, to get the most out of this experience, you need an iPad that can keep up with your creativity.
Our comprehensive guide on how to choose the best iPad for Procreate can help you find the perfect device for your artistic endeavors.
What are the benefits of drawing on an iPad with the Apple Pencil?
1. Precision and Control with Pencil
The Apple Pencil is a powerful tool that offers precision and control when drawing on an iPad. Its pressure sensitivity allows for varying line widths, and its tilt sensitivity makes it easy to create shading effects.
The Pencil’s low latency ensures that there is no delay between the movement of the stylus and what appears on the screen, making it feel like you’re drawing with a traditional pencil.
With its palm rejection feature, you can comfortably rest your hand on the screen while drawing without worrying about accidental marks. The Apple Pencil’s precision and control are essential for creating high-quality artwork on an iPad.
2. Wide Range of Gestures and Tools
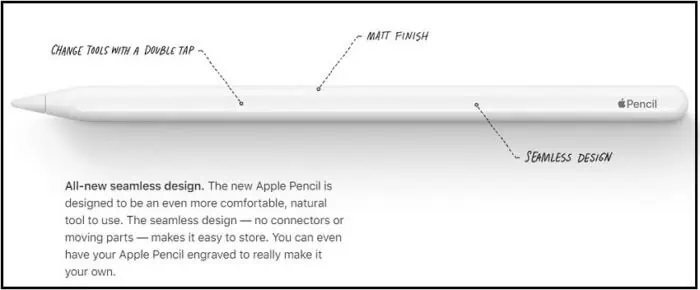
Drawing on the iPad with the Apple Pencil offers a wide range of gestures and tools that enhance the drawing experience. The 2nd Gen. Apple Pencil allows you to double-tap the side to switch tools or invoke favorite features, which can be customized in iOS Settings.
Procreate’s gesture controls also offer customizable options, such as toggling drawing assist or invoking the eyedropper. Art Set 4 offers hyper-real tools for drawing and painting, while Tayasui Sketches Pro provides the most realistic drawing tools available, including a unique watercolor wet brush.
Graphics offers variable-width brush strokes and pressure-sensitive support for the Apple Pencil. Additionally, Concepts allows for an infinite canvas and a wide variety of paper types and grids, with the ability to edit every stroke made with the Nudge, Slice, and Select tools.
These gestures and tools provide a more advanced and customizable drawing experience, allowing artists to create with precision and creativity.
3. Integration with Other Devices
The Apple Pencil can be easily integrated with other Apple devices, such as the iPad and Mac, to enhance the drawing experience and allow for seamless transfer of work between devices.
With Bluetooth turned on, the first-generation Apple Pencil can be paired with the iPad by removing the cap and plugging its lighting connector into the iPad, while the second-generation model can be paired by placing it on the magnetic side of the iPad.
The Logitech Crayon pairs automatically by pressing and holding its power button. With AstroPad Standard, an app that runs on both the iPad and Mac, any Mac app can be mirrored on the iPad screen, allowing for stylus support and full touch gestures.
The Apple Pencil can also be used for annotation, whiteboarding, and other tasks. This integration provides a prototypical example of Apple’s hardware and software working in complete unison, making drawing and sketching on the iPad a joy.

4. Ability to Create and Work on the Go
Drawing on the iPad with the Apple Pencil allows for increased mobility and flexibility in creating and working on artwork while on the go. With the iPad and Apple Pencil, artists can enjoy a variety of benefits, including:
- The ability to work in a variety of locations and situations, such as on an airplane, at a coffee shop, or in bed.
- The convenience of not needing to carry around traditional art supplies, such as paper, pencils, and paints.
- The ease of sharing and collaborating on digital artwork, whether it’s with other artists or clients.
- The flexibility to adjust and customize tools and settings in apps like Flow by Moleskine, Astropad Studio, and Procreate to suit individual preferences and needs.
- Thanks to cloud storage and backup features, the ability to work seamlessly across multiple devices.
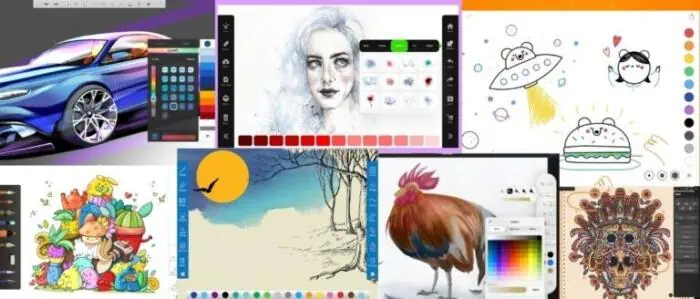
5. Rich Graphics, Image and Drawing Apps
Drawing on an iPad with the Apple Pencil can significantly enhance the quality of graphics, images, and drawings. The pressure-sensitive support of the Apple Pencil allows for precise and accurate strokes, making it an ideal tool for graphic designers, artists, and illustrators.
Various drawing apps, such as Graphic, Sketchbook, Comic Draw, and Sketch Club, are compatible with the Apple Pencil and offer a range of tools and features to take digital art to the next level.
With the ability to save and edit masterpieces across devices, drawing on an iPad with the Apple Pencil is a convenient and efficient way to create stunning artwork.
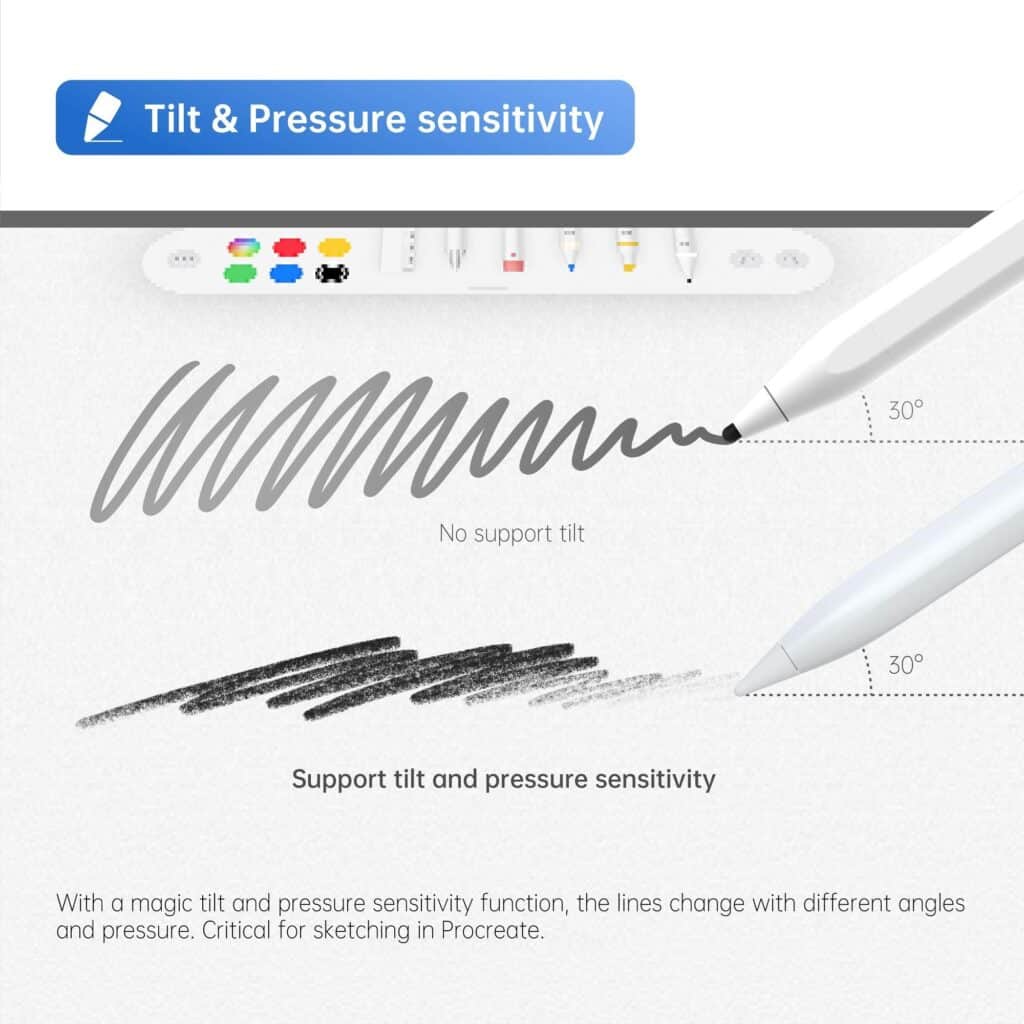
6. Support for Pressure Stylus Support
The pressure-sensitive stylus support of the Apple Pencil is a game-changer for drawing on the iPad. With pressure sensitivity, the Apple Pencil can detect how hard you’re pressing and change the thickness of the line accordingly.
This allows you to create lines that range from thin to thick, mimicking the effect of using a real pencil or pen.
Moreover, pressure sensitivity can also affect shading. By varying the pressure applied to the Apple Pencil, you can create different shades of gray, making your artwork more realistic and expressive.
For example, if you want to create a shadow, you can apply more pressure to the pencil, resulting in a darker shade. Conversely, if you want to create a highlight, you can apply less pressure, resulting in a lighter shade.
The pressure-sensitive stylus support of the Apple Pencil gives you greater control and precision over your artwork, allowing you to create stunning pieces that rival traditional media.
7. Access to iCloud, AirDrop and HomeKit
Using the Apple Pencil to draw on the iPad offers a plethora of benefits for artists and creatives. One of the most significant advantages is the seamless integration with iCloud, which allows you to access your drawings from any of your Apple devices.
This means that you can start a drawing on your iPad and continue working on it later on your iPhone or Mac.
Additionally, the ability to use AirDrop makes sharing your work with others a breeze. You can quickly send your drawings to other Apple devices or even share them with friends and colleagues.
Another benefit of using the Apple Pencil on the iPad is its integration with HomeKit. With HomeKit, you can use your Apple Pencil to control smart home devices, such as lights and thermostats, directly from your iPad.
This means that you can adjust the lighting and temperature in your workspace without ever having to put down your pencil.
8. Ability to Scan, Annotate and Translate Text
The ability to scan, annotate, and translate text benefits artists when drawing on the iPad with the Apple Pencil in several ways.
Firstly, scanning allows artists to easily import reference images or sketches into their digital workspace, providing them with a starting point for their artwork.
Annotating these images with the Apple Pencil allows artists to add notes or labels to their reference material, helping them to stay organized and remember important details.
The ability to translate text within Safari using the Apple Pencil can be helpful for artists who are working with non-English reference material or collaborating with artists from different language backgrounds.
For example, an artist working on a portrait may scan a reference photo into their iPad and use the Apple Pencil to annotate notes about the lighting or color.
They may also use the translation feature in Safari to read an article about portrait painting techniques in a different language.
The ability to scan, annotate, and translate the text with the Apple Pencil can streamline the artistic process and provide artists with more resources to create their best work.
9. Integration with Social Media and Email Apps
Integrating drawing on iPad with Apple Pencil with social media and email apps can be a game-changer for creative professionals and enthusiasts alike. With the right apps and tools, you can easily share your artwork and ideas with the world.
For example, Paper by WeTransfer allows you to export your sketches and notes to various social media platforms and emails, making it easy to showcase your creative work.
Similarly, LiquidText enables you to export your organized notes and excerpts into PDF and other standard formats, which you can then share via email or social media.
This integration feature provides a seamless experience for sharing and collaborating, allowing you to engage with your audience and receive feedback in real-time.
Integrating drawing on iPad with Apple Pencil with social media and email apps is a great way to expand your reach and connect with others who share your passion for creativity.
10. Ability to Create Creative Works and Inspire Creativity
Drawing on an iPad with an Apple Pencil can inspire creativity and help users create amazing works of art. With a range of drawing and painting apps available, artists of all levels can easily express themselves without the mess of traditional art supplies.
The iPad’s portability and all-in-one design mean that artists can create art anytime, anywhere.
Apps like Procreate, Sketchbook, and Adobe Fresco provide a range of tools and features, while Sketch Club offers a vibrant community of artists to connect with. Plus, sharing artwork online is easy with the iPad’s built-in social media capabilities.
What you need to consider when drawing on iPad with Apple Pencil
1. iPad Pro/iPad/iPad mini with Apple Pencil
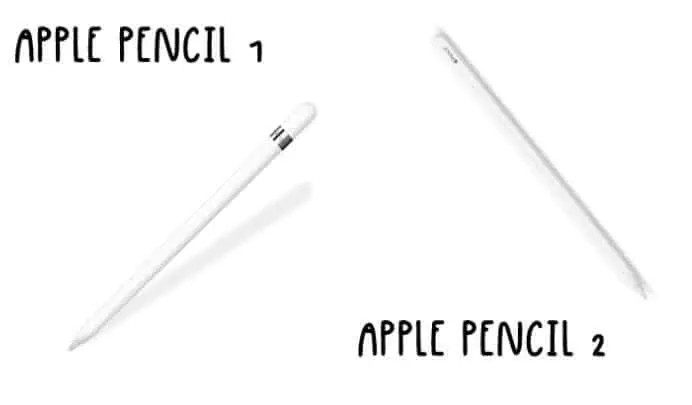
If you’re looking to enhance your drawing skills on the iPad, there are a few things to consider. First, make sure you have the right Apple Pencil for your iPad model.
The 1st generation Apple Pencil works with the iPad mini (5th generation), iPad (6th generation and later), iPad Air (3rd generation), iPad Pro 9.7-inch, iPad Pro 10.5-inch, and iPad Pro 12.9-inch (1st and 2nd generation).
The 2nd generation Apple Pencil works with the iPad mini (6th generation), iPad Air (4th generation), iPad Pro 11-inch (all generations), and iPad Pro 12.9-inch (3rd generation and later).
Next, consider investing in a screen protector to protect your iPad screen from scratches and smudges. This is especially important if you plan on using the Apple Pencil frequently, as the tip can wear down over time and potentially scratch your screen.
Optimize your drawing experience by adjusting the necessary settings. To change your settings for double-tap, go to Settings on your iPad and then select Apple Pencil. This will allow you to switch between tools more efficiently and show your color palette with ease.
Additionally, familiarize yourself with the various touch-sensitive features of the Apple Pencil, such as tilting the pencil to add shade or controlling the thickness of your lines by adjusting the pressure.
You can enhance your drawing skills on the iPad and make the most of your Apple Pencil. Remember to choose the right Apple Pencil for your device, protect your screen with a quality screen protector, and optimize your settings for a more efficient and enjoyable drawing experience.
With the right tools and techniques, you can create stunning digital art on your iPad.
2. Draw App
If you’re an iPad user with an Apple Pencil, you have access to a variety of drawing apps that can help you create professional-grade artwork.
One such app is Draw, which is specifically designed for drawing comics and graphic novels. Here’s a concise guide on how to use Draw on iPad with the Apple Pencil:
- Download and install the Draw app from the App Store.
- Open the app and select “New Document” to create a new drawing.
- Use the tool that enables you to lay out the panels on your page to create your desired layout.
- Choose a brush from the inking and coloring interface to start drawing.
- Use layers to build your drawings and experiment with different concepts on the digital sketchpad.
- Add lettering and design tools to add text and other elements to your drawing.
- Utilize symmetry features to make symmetrical patterns like kaleidoscope patterns and mandalas.
- Adjust the size, shape, and opacity of your brushes to create a range of effects and styles.
- Export your work as a video or GIF and share it on social media or with others on a project.
Draw is a highly effective tool for comic artists and provides a clutter-free, minimalist interface that is easy to navigate. The app’s features, such as the toolset for creating beautiful digital art, make it a valuable addition to your drawing apps for iPad list.
To optimize your drawing experience, you can customize the app’s settings to your own unique preferences. Don’t be afraid to experiment with the app’s various tools and features to create professional-grade artwork. With Draw, you have all the tools you need to create stunning comics and graphic novels.
3. Pencil Device
The Apple Pencil is a highly versatile tool that makes drawing and writing on an iPad an enjoyable experience. With its sleek and lightweight design, the Apple Pencil offers precision control when drawing or writing, making it a favorite among artists, designers, and students.
The Pencil’s low-latency brush strokes and built-in smarts set it apart from other third-party iPad styluses. It charges inductively through the iPad Pro, which means you don’t have to worry about carrying around extra cables or accessories.
The Pencil is compatible with several iPad models, including the iPad Pro (all models), iPad Air (3rd generation), iPad (6th and 7th generation), and iPad mini (5th generation).
Its palm rejection feature allows you to rest your hand on the iPad while drawing, and the pressure and tilt sensitivity of the nib offer a range of creative possibilities. The Apple Pencil is a must-have for anyone who wants to take full advantage of the iPad’s drawing capabilities.
4. iPad Pro
The iPad Pro, combined with the Apple Pencil, has become a go-to tool for many professional artists and designers due to its portability, ease of use, and advanced technology.
With a screen size of 12.9 inches and a response rate of only 9 ms with the Apple Pencil, the iPad Pro offers a comfortable and precise drawing experience.
Additionally, the Procreate Art App and other free Adobe apps available on the Apple App Store make it possible to create print-ready illustrations on the go.
Furthermore, the latest iPadOS 14 includes numerous advanced technologies that help artists, such as hover support for the Apple Pencil.
The iPad Pro and Apple Pencil combination provide an excellent digital drawing experience that rivals advanced drawing tablets and is unmatched among tablets.
5. Apple Pencil Pressure
The Apple Pencil has a huge dynamic range, meaning you can press it down hard to reach 100% pressure or opacity. However, if you draw with a lighter touch, you may not be able to enjoy the pencil’s full range of sensitivity. To adjust the feel of your pencil or stylus, use Procreate’s customizable pressure sensitivity curve.
This feature allows you to adjust the sensitivity of your pencil to suit the way you draw. You can tie brush size to pressure, so when you press down harder, you get a thicker stroke. Or you can tie brush tilt to opacity, so you get a solid line when you hold your brush upright, but that line gradually fades out as you tilt your pencil.
You can even morph between two different brush textures depending on the input from your Apple Pencil. To achieve optimal control, move your grip closer to the nib when doing detailed lettering or drawing. Remember to test how different pressures result in different line widths by drawing a series of vertical and horizontal lines.
6. Drawing Apps
Sketchbook is a versatile drawing app that caters to both beginners and professionals. With its user-friendly interface, it allows you to adjust the size, shape, and opacity of brushes to create a range of effects and styles. The app also offers symmetry features that make it easier to create symmetrical patterns.
Compatible with the Apple Pencil, it enables you to export your work as a video or GIF and supports various file types. Comic Draw is designed specifically for drawing comics and graphic novels.
It offers tools for laying out panels, perspective guides, and layers to build your drawings. It also has a digital sketchpad, an inking and coloring interface, and a lettering suite.
Sketch Club has a unique set of flexible digital brushes, vector tools, and fun procedural tools. It also has an integrated online community where you can upload your sketches and participate in challenges and competitions. Finally, AstroPad Studio allows you to use your iPad as a graphics tablet.
7. Pencil Shortcuts
When drawing on your iPad with the Apple Pencil, there are several shortcuts you can use to make your workflow more efficient. Here’s a quick guide to the different pencil shortcuts available:
- Double-tap the side of your Apple Pencil 2 to switch tools or invoke your favorite feature. You can customize this shortcut in iOS Settings or in Procreate’s Gesture Controls.
- In iOS Settings, the available shortcuts are: Switch Between Current Tool and Eraser (default), Switch Between Current Tool and Last Used, Show Color Palette, and Off.
- In Procreate Gesture Controls, the available shortcuts are: toggle drawing assist, invoke eyedropper, trigger quickshape, invoke quickmenu, toggle full screen, clear layer, and invoke copy-paste menu.
- To deactivate this feature, tap Off in iOS Settings.
- When working in a supported app, such as Notes, double-tap the lower section of the Apple Pencil 2 to quickly switch back to the tool you used last.
- To change your settings for double-tap, go to Settings > Apple Pencil.
By using these shortcuts, you can save time and focus on your creative work.
8. iPad Features
When it comes to drawing on the iPad with the Apple Pencil, there are a few key features to consider. First and foremost, the iPad’s ProMotion technology provides a 120 Hz refresh rate, making for a smooth and responsive drawing experience.
The iPad’s True Tone display also adjusts the color temperature to match your environment, reducing eye strain and ensuring accurate color representation.
Additionally, the iPad’s palm rejection technology allows you to rest your hand on the screen while drawing without accidentally making marks. The Apple Pencil itself is pressure-sensitive, allowing for precise and varied line thickness.
The iPad’s ability to use various drawing apps, such as Procreate and Adobe Fresco, provides a wide range of tools and effects to enhance your drawing experience. By utilizing these features, artists and designers can create stunning works of art on their iPads.
9. Accessories for Apple Pencil
When it comes to drawing on the iPad with the Apple Pencil, there are a variety of accessories that can enhance your experience.
For the first-generation Apple Pencil, a stand or grip can help with ergonomics and prevent it from rolling off the table. A case can also protect it when traveling.
The second-generation Apple Pencil has a flat edge and magnetic charging, but a case can still be useful for protection. Additionally, there are adaptable brushes that respond to the pressure and tilt of the Apple Pencil and apps like Procreate that unlock its full potential.
In terms of recommendations, a stand or grip is great for artists who need a more comfortable hold, while a case is useful for those who travel frequently.
Adaptable brushes and apps like Procreate are essential for artists who want to take their work to the next level. Ultimately, the accessories you choose will depend on your individual needs and preferences.
10. Drawing Techniques
Drawing on the iPad with an Apple Pencil is a great way to create digital art. Here are some techniques you can use to create different line weights, shading, and textures:
- Line Weight: To create different line weights, vary the pressure you apply to the Apple Pencil. Press down harder for thicker lines and lighter for thinner lines. You can also adjust the brush size in the settings of your drawing app.
- Shading: To add shading, use the side of the Apple Pencil and apply light pressure to create a lighter shade or heavy pressure to create a darker shade. You can also use a blending tool to blend different shades together for a smoother transition.
- Textures: There are many ways to create textures when drawing on an iPad with the Apple Pencil. You can use a textured brush to create a rough or grainy texture or use a pattern stamp to add a specific texture. You can also create your own textures by layering different shades and colors.
Remember, the key to improving your skills is to practice regularly. Study the techniques used by your favorite artists, experiment with different tools, and have fun while you draw. With time and practice, you’ll be able to create amazing artwork on your iPad with the Apple Pencil.
How to set up your workspace for drawing on iPad with Apple Pencil
Step 1: Choose your drawing tool
There are a variety of drawing apps for iPad that work with the Apple Pencil, so finding the one that best suits your needs might be a challenge. Because of its adaptability and the variety of effects it can produce, the brush tool is frequently used.
The pencil tool excels at freehand drawing and may be fine-tuned to produce sleek outlines. The Pen Tool gives you pinpoint control over curves and points, making it perfect for vector-based work.
Constructing complex geometric forms is a breeze with the Shape Tool. Drawings can also be modified and improved using the scissors and eraser tools. The pencil tool and the shape tool are two of the most accessible tools for newcomers.
Even though it’s trickier to use, the brush tool opens up a lot of artistic possibilities. The pen tool and the brush tool are important for accurate and detailed work for professionals. In the end, it’s up to you to figure out which methods and resources are most beneficial for you.
Step 2: Download the necessary software
You’ll need to get the appropriate app installed on your iPad before you can start sketching with an Apple Pencil. Vectornator, Paper by WeTransfer, and Adobe Photoshop are just a few of the possibilities out there. The app can be downloaded by searching for it in the App Store on the iPad.
After locating the software, the “Get” or “Download” button must be clicked before the installation can begin. The installation can be finished by following the on-screen directions. Make sure your Apple Pencil is synced with your iPad before you launch the app.
These programs allow for precise design work, a wide range of drawing and sketching tools, and pressure sensitivity, giving the artist full command over their creations. Now is the time to begin crafting your masterpiece.
Step 3: Set up your workspace
To set up your workspace for drawing on the iPad with the Apple Pencil, it is important to create a comfortable and ergonomic environment. Choose a well-lit area with a proper seating arrangement to avoid discomfort and strain on your arms and eyes.
Once you have selected your workspace, connect your Apple Pencil by removing the cap and plugging its lighting connector into your iPad. For the second-generation model, place the Apple Pencil on the magnetic side of the iPad. The iPad will immediately recognize the pen and pair with it.
To personalize your workspace, consider using a custom iPad case or stand. When selecting a drawing app, consider the canvas options and the responsiveness of the app to your finger or Apple Pencil. Vectornator is specifically designed to respond to your finger on the screen.
Finally, organize your iPad screen to optimize your workflow and make your tools easily accessible. Have fun creating digital art!
Step 4: Plug in your Apple Pencil
To use your Apple Pencil for drawing on your iPad, make sure Bluetooth is turned on. For the first-generation Apple Pencil, remove the cap and plug the lightning connector into your iPad’s charging port. Tap the “Pair” button to connect.
For the second-generation model, place the pencil on the magnetic side of the iPad to pair. Your iPad will display the Pencil’s charge level when connected. Remember to charge the Pencil regularly using your device’s charging port or compatible adapter. Avoid using the pencil with incompatible apps.
Step 5: Get started drawing
To begin drawing on your iPad with the Apple Pencil, the first step is to choose a drawing application that suits your needs. Consider the canvas options and the size of your artwork before making a decision. If you don’t have a stylus, don’t worry; Vectornator is designed to respond to your finger on the screen.
Once you have selected an application, start practicing by downloading a bunch of apps and experimenting with different brushes and settings. Apple’s built-in Notes app is a good starting point, but there are plenty of other drawing apps that you can try in the App Store.
When you’re ready to start sketching, simply open your chosen app and begin drawing with your Apple Pencil. Procreate is a popular app that works natively with Apple Pencil pressure and tilt, but you can also customize brush responses to a huge degree.
Remember that the key to improving your drawing skills is to practice constantly. Study the styles of your favorite artists and try to recreate them on your digital canvas. If you need a drawing 101 course, there are numerous drawing websites and services that offer great tutorials, videos, and PDFs.
As you become more comfortable with your Apple Pencil, you can experiment with shading and other techniques to create more complex artwork. To adjust brush settings, simply explore the options in your drawing application and experiment with different brush types, sizes, and opacities.
When shading, consider the direction of your light source and use lighter strokes to create highlights and darker strokes to create shadows. Don’t be afraid to layer multiple strokes to create depth and texture in your artwork.
To begin drawing on your iPad with the Apple Pencil: Choose a drawing application, practice constantly, study the styles of your favorite artists, experiment with brush settings, and use shading and other techniques to create depth and texture. With these tips, you’ll be on your way to creating beautiful digital artwork in no time!
Tips and tricks for getting the most out of your drawing experience with Apple Pencil
1. Enable AssistiveTouch for an easy way to control your iPad with your hands
AssistiveTouch is a feature on the iPad that allows for easy control with your hands while drawing with the Apple Pencil. This feature can greatly enhance your drawing experience by providing quick access to frequently used functions.
To enable AssistiveTouch on the iPad, first access the Settings app. Then, select Accessibility and turn on AssistiveTouch. Once enabled, a small circle will appear on the screen, which can be moved around and customized to include different functions such as Home, Siri, or Volume.
Simply tap the circle to access these functions without having to use physical buttons on the iPad.
Enabling AssistiveTouch can be especially helpful for those who may have difficulty using physical buttons or gestures due to physical limitations or disabilities. It can also reduce strain on the hands and fingers, making the drawing process more comfortable and enjoyable.
To customize the AssistiveTouch menu, select Customize Top Level Menu and add or remove functions as needed. With AssistiveTouch, drawing with the Apple Pencil on an iPad can be a seamless and effortless experience.
2. Enable sound feedback for Apple Pencil for greater precision
Enabling sound feedback on your Apple Pencil can enhance your drawing precision by providing an audible confirmation of your strokes on the iPad.
This feature is particularly useful for artists who want to ensure that their strokes are accurate and consistent. To activate sound feedback for your Apple Pencil, follow these simple steps:
- Go to Settings on your iPad.
- Tap on Sounds and Haptics.
- Scroll down to the bottom of the page and toggle on “Apple Pencil Feedback.”
Once you have enabled sound feedback, you can adjust the volume of the feedback by using the volume buttons on your iPad. You can also turn off sound feedback by toggling off the “Apple Pencil Feedback” option in the Sounds & Haptics settings.
Enabling sound feedback for your Apple Pencil can help you achieve greater precision and consistency in your drawings. With this feature, you can easily identify where you have made strokes on the iPad, making it easier to refine and perfect your artwork.
3. Adjust the pressure sensitivity of Apple Pencil to your preference
Guide: Adjusting Pressure Sensitivity on Your Apple Pencil
The Apple Pencil is a powerful tool for artists and designers, but its default pressure sensitivity settings may not be suitable for everyone. Fortunately, Procreate offers customizable pressure sensitivity curves that allow you to adjust the feel of your pencil or stylus. Here’s how to do it:
- Open Procreate on your iPad.
- Tap on the wrench icon to open the Actions menu.
- Select “Prefs” and then “Gesture Controls.”
- Tap on “Apple Pencil” to access the settings.
- Choose “Pressure Curve” to see the default curve.
- Tap and drag the curve to adjust the pressure sensitivity to your liking.
Note that a flatter curve will require less pressure to achieve full opacity, while a steeper curve will require more pressure. Experiment with different curves to find the one that feels most natural to you.
Tips for Experimenting with Pressure Sensitivity:
- Test different pressure sensitivity settings by drawing vertical and horizontal lines with varying pressure levels.
- Adjust the pressure sensitivity curve until you can achieve the desired line thickness with your natural drawing pressure.
- Try associating brush size with pressure or opacity with tilt to create unique effects.
- Move your grip closer to the nib for more precision when doing detailed lettering or drawing.
- Don’t be afraid to pinch-to-zoom with your free hand to get a better view of your work.
- Remember that different brushes may require different pressure sensitivity settings to achieve the desired effect.
Adjusting the pressure sensitivity of your Apple Pencil can greatly enhance your drawing experience and help you achieve the results you want. Take the time to experiment with different settings and find the one that works best for you. With the sensitivity, speed, and precision of the Apple Pencil, the possibilities are endless.
4. Take advantage of third-party drawing apps for greater versatility
If you’re looking to enhance your drawing experience with your Apple Pencil, third-party drawing apps can provide you with additional features and tools that can help you take your drawing skills to the next level. Here’s a concise guide on how to use third-party drawing apps on your iPad:
- Research and choose a third-party drawing app that suits your needs and budget. Some popular options include Sketchbook, Sketch Club, and Concepts.
- Download and install the app from the App Store.
- Open the app and familiarize yourself with the user interface. Most apps will have a toolbar with various tools and brushes that you can use to create your artwork.
- Connect your Apple Pencil to your iPad. Most apps will automatically detect the Apple Pencil and adjust the settings accordingly.
- Choose your preferred tool or brush, and start drawing! Experiment with different brushes and settings to find what works best for you.
- Take advantage of any additional features or tools offered by the app. For example, Sketchbook has symmetry features that make it easier to create symmetrical patterns, while Sketch Club has a vibrant community of artists that you can follow and learn from.
- Save your artwork and share it with others. Most apps will allow you to export your work as a variety of file types, including JPG, PNG, and PSD, which you can then share on social media or collaborate with others on a project.
Using third-party drawing apps with your Apple Pencil can open up a world of possibilities for your artwork. With additional features and tools, you can create more complex and intricate pieces of art.
So why not give it a try and see what new possibilities you can unlock with your Apple Pencil and a third-party drawing app?
5. Utilize the hover feature on iPad to avoid unwanted marks
The hover feature on the iPad with the Apple Pencil is an incredibly useful tool that can improve your overall drawing experience.
This feature allows you to see a preview of the size, shape, texture, tilt, and azimuth of your brush before you use it, which can help you avoid making unwanted marks on your canvas.
Here’s a step-by-step guide on how to enable the hover feature on the iPad with the Apple Pencil:
- Make sure your iPad is running iPadOS 16.1 or newer.
- Ensure you have an iPad Pro 12.9-in. (6th generation) or iPad Pro 11-in. (4th generation) while using the Apple Pencil 2nd generation.
- Open the Procreate app and select the brush tool.
- Hover the tip of your Apple Pencil just above the canvas, and the brush cursor will become dynamic.
- The cursor will display a preview of the brush’s size, shape, texture, tilt, and azimuth.
- Adjust your brush size and opacity using unique gesture controls.
- Start drawing with your Apple Pencil, and enjoy the improved precision and control that the hover feature provides.
In addition to enabling the hover feature, it’s important to note that you can rest your hand on the screen while drawing with the Apple Pencil thanks to the iPad’s palm-rejection technology. This will make your drawing experience more comfortable and natural.
Additionally, if you want to draw perfect shapes such as circles and squares, draw the shape you want and don’t lift the pencil right away. The shape will snap into a perfect circle or square.
The hover feature on the iPad with the Apple Pencil is an excellent tool that can help you achieve more precise and controlled strokes while drawing. Give it a try and see how it can improve your artwork.
6. Take advantage of the HomePod to draw hands-free
Unfortunately, it is not possible to use your HomePod to draw hands-free with your Apple Pencil. The HomePod is a smart speaker that can be used to control your home and play music, but it does not have a screen or any drawing capabilities.
The Apple Pencil is designed to be used with an iPad or other compatible Apple device with a touchscreen display. Therefore, to use your Apple Pencil for drawing, you will need to connect it to your iPad and use it directly on the screen.
7. Take advantage of Siri Shortcuts to streamline your workflow
To optimize your drawing workflow with Apple Pencil on iPad, you can use Siri Shortcuts to automate common tasks.
With Siri Shortcuts, you can create custom voice commands that trigger a series of actions, such as opening your favorite drawing app, changing brush settings, and exporting your finished work.
Here’s how to set up and customize Siri shortcuts for your drawing workflow:
- Open the Shortcuts app on your iPad.
- Tap the “+” button to create a new shortcut.
- Tap “Add Action” and search for the action you want to perform, such as “Open App” or “Set Brush Size”.
- Customize the action by selecting the app or setting you want to use.
- Repeat steps 3–4 for each action you want to include in your shortcut.
- Tap “Add to Siri” and record a custom phrase that will trigger the shortcut.
- Test the shortcut by saying the custom phrase to Siri.
Some examples of Siri shortcuts you can create for your drawing workflow include:
- “Start Drawing” shortcut that opens your favorite drawing app and sets your brush settings to your preferred defaults
- “Export Drawing” shortcut that saves your finished work to a specific location and shares it with your preferred method
- The “Change Brush Size” shortcut allows you to quickly adjust your brush size without having to manually go through the app settings.
By using Siri Shortcuts, you can save time and streamline your drawing workflow on the iPad with the Apple Pencil.
With just a few simple steps, you can create custom voice commands that automate common tasks and help you focus on your creative process. Give it a try and see how it can enhance your drawing experience.
8. Use iPad’s accessibility features to customize the experience
To customize your drawing experience with the Apple Pencil using the accessibility features on the iPad, follow these simple steps:
- Turn on AssistiveTouch: Go to Settings > Accessibility > Touch > AssistiveTouch, and turn it on. This feature allows you to perform actions like tapping, swiping, and pinching with a single finger instead of using multiple fingers.
- Turn on Zoom. Go to Settings > Accessibility > Zoom and turn it on. This feature allows you to zoom in on a specific area of the screen and adjust the zoom level to your liking.
- Turn on VoiceOver: Go to Settings > Accessibility > VoiceOver, and turn it on. This feature reads out loud the text on the screen and the actions you perform with your Apple Pencil.
- Customize AssistiveTouch actions: Go to Settings > Accessibility > Touch > Customize Top Level Menu, and select the actions you want to perform with a single tap of the AssistiveTouch button.
By using these accessibility features, you can enhance your drawing experience with the Apple Pencil on the iPad. For example, AssistiveTouch allows you to perform actions like undo, redo, and save with ease, while Zoom allows you to focus on details and precision in your drawing.
VoiceOver can also be helpful for those with visual impairments, as it reads out loud the text and actions on the screen. These features can make the drawing experience more accessible and enjoyable for everyone.
Remember to turn off the features when you no longer need them to conserve battery life and improve performance.
10. Capture inspiration with the ArtBoard feature in iPad’s Notes app
The ArtBoard feature in the iPad’s Notes app is a great tool for capturing inspiration for your drawings using the Apple Pencil. Unlike a regular note, an ArtBoard is a blank canvas that allows you to create a drawing from scratch.
To create a new ArtBoard, open the Notes app and tap the “+” button in the bottom left corner. Then, tap “ArtBoard” to create a new canvas.
Once you have your ArtBoard, you can choose a background color or image by tapping the “…” button in the top right corner and selecting “Choose a Background.” From here, you can select a solid color or choose an image from your photo library.
To start drawing, tap on the pencil icon at the bottom to reveal the toolbar. From here, you can switch to a pen or a marker tip and pick any color you want. You can also adjust the opacity and thickness of the lines by using the sliders on the toolbar. Additionally, you can use the eraser and ruler tools to refine your drawing.
If you want to use a custom color, tap on the color picker icon and select “Custom.” From here, you can choose a color using the color wheel or by entering the RGB values.
Once you’re done with your ArtBoard, you can save it by tapping the “Done” button in the top left corner. To share your ArtBoard, tap on the “…” button in the top right corner and select “Share.” You can choose to export your ArtBoard as a PDF or image file or share it directly with others through email, messaging, or social media.
The ArtBoard feature in the iPad’s Notes app is a powerful tool for capturing inspiration and creating drawings with the Apple Pencil. To use it, create a new ArtBoard, choose a background color or image, and use the drawing tools to create your masterpiece.
Remember to adjust the opacity and thickness of the lines, use the eraser and ruler tools, and pick a custom color if needed. Save and share your art board as needed to showcase your creativity.
Frequently Asked Questions (FAQ)
Q. What is the Apple Pencil?
A: Apple created the Apple Pencil, a stylus that is compatible with various iPad models. It has a pencil-like body, a small replaceable plastic tip, and a charging mechanism. The second-generation model charges inductively through the iPad Pro.
The Apple Pencil is used for precision tasks like writing, sketching, and navigating through the operating system. It offers pressure and tilt sensitivity and palm rejection and is perfect for drawing, note-taking, and creating art. The Apple Pencil is compatible with all Apple iPads that support it and needs to be paired and charged regularly.
Q. What is the best drawing app for the iPad?
A: Sketchbook by Autodesk is the top drawing app for iPad that works well with the Apple Pencil. This award-winning app has a user-friendly interface that caters to both novice and expert artists. It offers a range of brushes that allow for adjustments in size, shape, and opacity, as well as symmetry features for creating symmetrical patterns.
Sketchbook also allows for the exporting of work as videos or GIFs and supports a variety of file types. The premium version offers additional features such as extra color harmonies, personalized gradients, layer grouping, and exporting work as a PDF.
Sketchbook is an excellent choice for artists looking to create digital art on their iPad with the help of the Apple Pencil.
Q. What is the difference between the iPad and the iPad Pro?
A: The iPad Pro has a larger and more comfortable screen for drawing compared to the regular iPad. It also has a more powerful processor and better graphics, allowing for smoother and more complex drawings.
Additionally, the iPad Pro has more storage options and a wider range of accessories. However, the regular iPad is a more affordable option for those who only plan on using it for drawing and not running multiple apps simultaneously.
Q. How do I use the Apple Pencil?
A: To use the Apple Pencil to draw on an iPad, first make sure your device is compatible and that the Apple Pencil is charged. To pair the Apple Pencil with your device, simply connect it to the device’s charging port. Once paired, the Apple Pencil will automatically connect to your device whenever it’s in range.
To start drawing, open the Notes app and create a new note. Tap the Markup icon at the top-right corner of the screen and select the drawing tool of your choice from the set of tools displayed at the bottom of the screen. You can adjust the line thickness and color saturation as desired.
To erase, select the eraser tool and tap the area you want to remove. To move an element, use the selection tool to select it and drag it to a new location. Remember to charge the Apple Pencil regularly to ensure proper functionality. Enjoy your new drawing tool!
Q. How do I connect the Apple Pencil to my iPad?
A: The Apple Pencil is a powerful tool for digital artists, providing a natural drawing experience on the iPad. To connect the Apple Pencil to an iPad, you first need to ensure you have the right model for your device.
The 1st generation Apple Pencil is compatible with the iPad mini (5th generation), iPad (6th generation and later), iPad Air (3rd generation), and iPad Pro 9.7-inch, 10.5-inch, and 12.9-inch (1st and 2nd generation).
The 2nd generation Apple Pencil is compatible with the iPad mini (6th generation), iPad Air (4th generation), iPad Pro 11-inch (all generations), and 12.9-inch (3rd generation and later).
To connect the 1st generation Apple Pencil manually, remove the small white cap on the Pencil and plug it into the charging port on the bottom of the iPad.
Follow the prompt to pair the pencil with the iPad. For the 2nd generation model, place the pencil on the magnetic side of the iPad, and it will automatically pair with the device. When connected, the iPad briefly displays the Pencil’s battery level.
To customize the double-tap function of the 2nd generation Apple Pencil, go to Settings on your iPad and select Apple Pencil. Connecting the Logitech Crayon is even simpler: press and hold the power button until the LED lights up, then start writing.
Connecting the Apple Pencil to an iPad is a straightforward process that requires Bluetooth to be turned on and the physical connection, or magnetic attachment, of the Pencil to the iPad.
Q. Is it easy to draw on the iPad with the Apple Pencil?
A: Drawing on the iPad with the Apple Pencil is a breeze thanks to the seamless integration of hardware and software. The pressure-sensitive nib allows for precise and responsive sketching and writing, while the entire cone of the nib is touch-sensitive for shading with digital brushes.
Apple’s Notes app is a great starting point for practicing, but there are plenty of other drawing apps available in the App Store. With the Apple Pencil, you’ll have extra control as you draw, making it easier to create detailed and professional-looking digital art.
Q. What kind of accessories do I need for drawing on the iPad with the Apple Pencil?
A: To draw on an iPad with an Apple Pencil, you will need an iPad or iPad Pro that supports the Apple Pencil or Apple Pencil 2, an Apple Pencil or Apple Pencil 2 stylus, and the ProCreate art app from the Apple App Store.
Additionally, you can enhance your drawing experience with accessories such as a stand, grip, or case holder. The Apple Pencil and iPad integration is seamless, making drawing and sketching on the iPad a joy.
Q. How do I use the pen tool on my iPad?
A: To use the Pen Tool on the iPad for drawing with the Apple Pencil, open the Notes app and create a new note. Tap the Markup icon at the top right of the screen and select the Pen Tool, which is the second option from the left on the bottom toolbar.
Start drawing or writing with the Pen Tool and adjust the thickness of the lines and the saturation of the color by tapping the tool again and selecting your preferred options. To erase any mistakes, select the Eraser Tool and tap the areas you want to remove.
For perfect shapes, draw the shape and wait for it to snap into a perfect circle or square. Remember, the entire cone of the pencil nib is responsive, so you can use the side of the pencil to shade with your digital brushes. Experiment with different brushes and apps to find the ones that work best for your needs.
Q. What are the best settings for drawing on the iPad with the Apple Pencil?
A: To optimize your drawing experience with an Apple Pencil on an iPad, adjust the settings in the Apple Pencil section of the Settings app. Here, you can choose what the double-tap gesture on the pencil does, including switching between tools, activating the eraser, or showing the color palette.
You can also select which stylus to use for drawing and activate Scribble. For the drawing app, it’s recommended to use a high-quality app like Procreate or Adobe Photoshop that supports pressure sensitivity, tilt, and palm rejection. It’s also recommended to practice with the pencil by drawing vertical and horizontal lines to test pressure variations and experiment with grip for optimal control.
Accessory recommendations include a smart keyboard for protection and a tablet stand for proper tilt.
Q. How do I save my drawings on the iPad with the Apple Pencil?
A: First, open the app where you’ve created the drawing to save your drawings on the iPad with the Apple Pencil. Tap on the “Done” button and select “Save Changes” to save your drawing. If you want to export your drawing to another app or share it with someone, tap on the share icon and select the desired option.
It’s important to note that some apps may have different saving or exporting options, so it’s always a good idea to check the app’s instructions or help section for specific guidance.
Q. What app is used to draw with the Apple Pencil?
A: There are several apps available for drawing with the Apple Pencil on an iPad, but the two most popular ones are Sketch Club and Tayasui Sketches Pro. Sketch Club offers a vibrant community of artists, daily challenges, a wide range of drawing tools, and the ability to import others from the community.
Tayasui Sketches Pro, on the other hand, aims to provide the most realistic drawing tools available, including a unique watercolor wet brush. Both apps offer iCloud sync, allowing you to back up your drawings and pick them up on another iPad or even the iPhone version. As a beginner artist, it’s essential to experiment with different apps to find the one that suits your needs and preferences.
Q. How is the Apple Pencil different from other styluses?
A: The Apple Pencil stands out from other styluses on the market due to its precision, palm rejection, pressure and tilt sensitivity, pencil-like weighting, and low latency. Unlike other styluses, it is designed to work like a traditional pencil, with a small plastic tip that connects with the iPad’s display.
It also has a built-in charging mechanism and can be used for navigating through the operating system. While more affordable Apple Pencil alternatives are available, they typically lack the same accuracy and functionality.
Other related articles: